
ThermoPro delivers precision cooking tools, helping you achieve professional results every time. Their thermometers transform BBQ, reverse searing, and roasting into effortless, juicy meals.
With ThermoPro, eliminate overcooked wastage and enjoy perfectly cooked food consistently. Explore detailed instruction manuals available online for optimal performance and ease of use.
Reactive Lab Pte Ltd, based in Singapore, is the company behind these innovative cooking solutions, ensuring quality and reliability.
What is a ThermoPro Meat Thermometer?
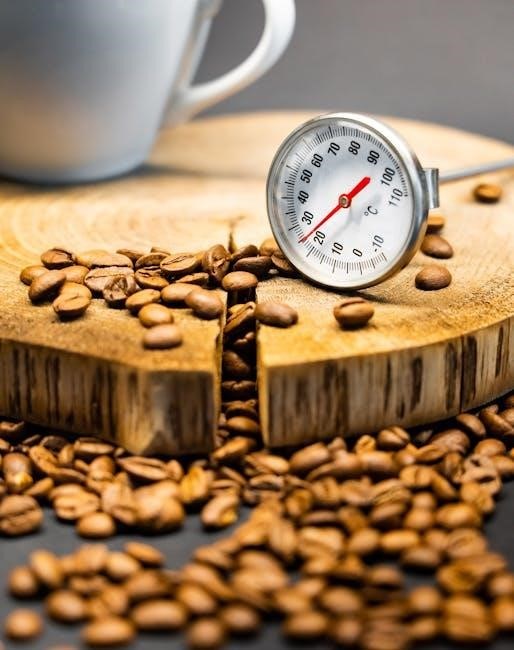
ThermoPro meat thermometers are precision instruments designed to accurately measure the internal temperature of food, ensuring perfectly cooked meals every time. These thermometers go beyond basic temperature readings, offering features like multiple measurement modes and rapid response times.
Available in various models – TP-03H, TP-01H, TP-19, TP-20B, TP-17, TP-16, TP-25H2 and more – ThermoPro caters to diverse cooking needs. Each model boasts a high-accuracy probe and a clear, easy-to-read display.
Detailed instruction manuals, accessible in PDF format, guide users through each thermometer’s specific functionalities. ThermoPro aims to empower both novice and experienced cooks to achieve professional-level results with confidence and ease, eliminating guesswork from the cooking process.
Why Use a ThermoPro Meat Thermometer?
ThermoPro meat thermometers eliminate the uncertainty of cooking, preventing undercooked or overcooked food – a common source of wasted meals. They guarantee food safety by ensuring meats reach safe internal temperatures, protecting against foodborne illnesses.
These thermometers are invaluable for various cooking methods, including BBQ, reverse searing, and oven roasting, delivering consistently juicy and flavorful results. ThermoPro simplifies complex techniques, making professional-quality cooking accessible to everyone.
Access to comprehensive instruction manuals, available online, ensures users can fully leverage the thermometer’s features. Investing in a ThermoPro means investing in perfectly cooked food, reduced waste, and a more enjoyable cooking experience.
Understanding Your ThermoPro Model
ThermoPro offers diverse models; consult your specific instruction manual for detailed guidance. These manuals, often in PDF format, detail components and functions.
Download manuals from the official website to maximize your thermometer’s potential and ensure accurate, safe cooking.
Identifying Your Specific ThermoPro Model

Accurate identification is crucial for accessing the correct manual and maximizing your ThermoPro thermometer’s features. ThermoPro offers a range of models, including the TP-510, TP-03H, TP-01H, TP-19, TP-20B, TP-17, TP-16, and TP-25H2, each with unique capabilities.
Locate the model number printed on the thermometer’s body, often on the back or near the battery compartment. Once identified, visit the ThermoPro website (https://www.thermopro.com.sg/manual.php) or https://www.thermoproshop.co.za/instruction-manual to download the corresponding PDF manual.
These manuals provide detailed instructions tailored to your specific model, ensuring optimal performance and accurate temperature readings. Utilizing the correct manual guarantees you’ll understand all functionalities and achieve perfect cooking results.
Key Components of a ThermoPro Thermometer
A typical ThermoPro thermometer comprises several key components. These include a temperature probe, designed for accurate internal food temperature measurement, and a display screen showcasing readings and settings. Most models feature buttons for power, mode selection, and setting alarms.
The battery compartment houses the power source, while some models include a magnetic backing for convenient storage. Advanced models may have a backlight for visibility in low-light conditions and a timer function for cooking management.
Understanding each component’s function, as detailed in your model’s manual, is vital for effective operation. Refer to the downloaded PDF from ThermoPro’s website for a diagram and explanation of all parts.

Getting Started: Initial Setup
ThermoPro thermometers require initial battery insertion for operation. Download the appropriate instruction manual in PDF format from their website for detailed setup guidance.
Ensure proper battery installation and familiarize yourself with basic power-on procedures before first use.
Inserting Batteries
ThermoPro thermometers typically require AAA or button cell batteries, depending on the specific model. Consult your product’s instruction manual – available as a downloadable PDF from the official ThermoPro website – to confirm the correct battery type and quantity.
Locate the battery compartment, usually found on the back or within the handle of the thermometer. Gently open the compartment cover. Insert the batteries, paying close attention to the polarity markings (+ and -) indicated inside the compartment. Incorrect battery insertion will prevent the thermometer from functioning correctly.
Ensure the batteries are securely seated and the compartment cover is firmly closed. A properly sealed compartment protects the batteries and maintains accurate readings. Always use fresh batteries for optimal performance and longevity of your ThermoPro thermometer.
Powering On and Basic Operation
To power on your ThermoPro thermometer, locate the power button – often labeled with a power symbol – and press it briefly. The display should illuminate, indicating the unit is active. Some models may feature an auto-on function when the probe is deployed.
Basic operation involves selecting your desired temperature unit (Celsius or Fahrenheit) using the appropriate button, typically labeled “°C/°F”. Refer to your specific model’s manual for precise button locations and functions. The display will show the current temperature reading when the probe is inserted into the food.
Familiarize yourself with the display icons, which indicate battery level, measurement mode, and alarm status. ThermoPro manuals, available online, provide detailed explanations of all display features and operational procedures.
Using the Thermometer for Cooking
ThermoPro thermometers offer precise temperature monitoring for perfect results. Select the correct mode, insert the probe properly, and utilize display features for optimal cooking performance.
Selecting the Correct Measurement Mode
ThermoPro thermometers often feature multiple measurement modes to suit various cooking needs. Understanding these modes is crucial for accurate temperature readings. Typically, you’ll find options for measuring internal meat temperature, surface temperature, and ambient temperature.
For most cooking applications, the internal meat temperature mode is essential. Ensure the probe is inserted correctly to obtain a representative reading. Some models also offer pre-programmed settings for different meat types – beef, poultry, pork, and lamb – simplifying the process.
Surface temperature mode is useful for grill grates or pan temperatures, while ambient temperature helps monitor the surrounding cooking environment. Refer to your specific ThermoPro model’s manual for detailed instructions on navigating and selecting the appropriate measurement mode for your culinary task.
Temperature Measurement Techniques
ThermoPro thermometers provide accurate readings when used correctly. For internal meat temperature, insert the probe into the thickest part of the meat, avoiding bone, fat, or gristle. Ensure the probe tip is centered within the muscle for a representative temperature.
When measuring thinner cuts, insert the probe horizontally from the side. Avoid over-insertion, which can lead to inaccurate readings. For surface temperatures, gently press the probe against the surface, ensuring good contact.
Always allow the thermometer to stabilize before recording the temperature. Refer to your ThermoPro manual for specific guidance on probe placement and stabilization times. Proper technique guarantees reliable results, helping you achieve perfectly cooked dishes every time.
Using the Backlight and Other Display Features
ThermoPro thermometers feature user-friendly displays with helpful functions. The backlight illuminates the screen for easy reading in low-light conditions – typically activated by pressing a dedicated button. Many models include automatic backlight shut-off to conserve battery life.
The display shows current temperature, set temperature (for alarms), and timer countdown. Some ThermoPro models offer selectable temperature units (°F/°C). Icons indicate battery level, alarm status, and measurement mode.
Consult your specific model’s manual for detailed explanations of all display features and button functions. Understanding these features enhances your cooking experience and ensures accurate temperature monitoring.

Specific Cooking Applications
ThermoPro provides temperature guides for beef, poultry, pork, and lamb, ensuring perfectly cooked meals. Refer to your manual for precise temperature recommendations.
Achieve optimal doneness and food safety with these helpful guidelines, elevating your culinary creations.
Beef Temperature Guide
ThermoPro thermometers are invaluable for achieving perfectly cooked beef, ensuring optimal flavor and tenderness. Utilize your manual for precise guidance, as temperatures vary by cut and desired doneness;
Rare (125-130°F): Cool red center. Ideal for tender cuts like filet mignon. Medium-Rare (130-140°F): Warm red center. Excellent for ribeye and New York strip. Medium (140-150°F): Warm pink center. Suitable for sirloin and top round.
Medium-Well (150-160°F): Slightly pink center. Good for tougher cuts needing more cooking. Well-Done (160°F+): No pink. Best for ground beef or when a thorough cook is essential.
Always allow for carryover cooking – the temperature will continue to rise slightly after removal from heat. Consult your ThermoPro manual for specific alarm settings to ensure perfect results every time.
Poultry Temperature Guide
ThermoPro thermometers are crucial for safe and delicious poultry preparation. Refer to your manual for model-specific features and accurate temperature readings. Food safety is paramount when cooking poultry, so precise temperature monitoring is essential.
Chicken & Turkey (165°F): Ensure the thickest part of the thigh reaches 165°F (74°C) to eliminate harmful bacteria. Use your ThermoPro to verify this temperature in multiple locations. Dark meat requires a higher temperature than white meat.
Duck & Goose (165°F): Similar to chicken and turkey, 165°F is the recommended internal temperature. These birds often have thicker fat layers, impacting cooking time.
Utilize the alarm function on your ThermoPro to alert you when the target temperature is reached, preventing overcooking and ensuring juicy, flavorful results.
Pork & Lamb Temperature Guide
ThermoPro thermometers guarantee perfectly cooked pork and lamb, enhancing flavor and ensuring safety. Consult your device’s manual for specific instructions and optimal usage. Achieving the correct internal temperature is vital for both tenderness and food safety.
Pork (145°F): The USDA recommends 145°F (63°C) for pork chops, roasts, and tenderloin, followed by a three-minute rest. Use your ThermoPro to confirm this temperature in the thickest part, avoiding bone contact.
Lamb (145°F Medium-Rare, 160°F Medium): Lamb is often enjoyed medium-rare. For medium-rare, aim for 145°F (63°C); for medium, 160°F (71°C). Utilize the ThermoPro’s alarm feature to prevent overcooking.
Remember to allow the meat to rest after cooking, allowing the juices to redistribute for a more tender and flavorful experience.

Advanced Features & Functions
ThermoPro thermometers offer temperature alarms, timer functions, and maximum/minimum temperature recording. Refer to your manual for detailed instructions on utilizing these features effectively;
Setting Temperature Alarms
ThermoPro thermometers allow you to set custom temperature alarms, ensuring your food reaches the desired doneness without constant monitoring. Consult your specific model’s manual, as the process varies slightly. Generally, you’ll use the buttons on the thermometer to navigate to the alarm setting menu.
Here, you can input your target temperature. Once set, the thermometer will beep or alert you when the measured temperature reaches or exceeds your programmed value. This feature is invaluable for preventing overcooking or ensuring food safety. Remember to check the manual for details on disabling or adjusting the alarm volume. Properly utilizing this function elevates your cooking precision and frees you to focus on other aspects of meal preparation.
Using the Timer Function
ThermoPro thermometers often include a built-in timer, a convenient feature for managing cooking times alongside temperature monitoring. Refer to your model’s manual for specific instructions, as button layouts differ. Typically, you’ll access the timer function through the thermometer’s menu system using the control buttons.
Once activated, you can set the desired duration. The timer will count down, alerting you when the time expires. This is particularly useful for recipes requiring precise timing, like resting meats or simmering sauces. The timer operates independently of the temperature readings, providing a comprehensive cooking management tool. Remember to consult the manual for details on starting, pausing, and resetting the timer function.
Understanding Maximum/Minimum Temperature Recording
Many ThermoPro thermometers feature Max/Min temperature recording, a valuable tool for monitoring temperature fluctuations during cooking. This function automatically stores the highest and lowest temperatures reached throughout the process. Accessing these recorded values usually involves pressing a dedicated “Max/Min” button on the device, as detailed in your specific model’s manual.
This feature is especially helpful for longer cooks, like smoking or roasting, allowing you to assess the temperature range the food experienced. It helps identify potential temperature dips or spikes, ensuring food safety and quality. Reviewing the Max/Min temperatures provides insights into cooking consistency and helps refine your technique for future meals. Always refer to your manual for precise operation.

Care and Maintenance
ThermoPro thermometers require gentle cleaning with a damp cloth. Avoid immersion and harsh chemicals. Proper storage ensures longevity and accurate readings, as detailed in the manual.
Cleaning Your ThermoPro Thermometer
Maintaining your ThermoPro thermometer’s hygiene is crucial for accurate readings and longevity. Always disconnect or remove batteries before cleaning. The probe, being the most susceptible to contamination, requires careful attention. Gently wipe the probe with a damp cloth after each use, removing any residual food particles or liquids.
Avoid immersing the thermometer body in water or any other liquid, as this can damage the electronic components. Do not use abrasive cleaners, scouring pads, or harsh chemicals, as these can corrode the probe and affect its accuracy. For stubborn residue, a mild soap solution can be used sparingly, followed by a thorough wipe with a clean, damp cloth.
Ensure the thermometer is completely dry before storing it. Regular cleaning, as outlined in your ThermoPro manual, will ensure consistent performance and prevent the spread of bacteria.
Proper Storage
Correct storage significantly extends the life of your ThermoPro thermometer. After thoroughly cleaning and drying the unit, store it in a cool, dry place, away from direct sunlight and extreme temperatures. Avoid storing it in areas with high humidity, as this can lead to corrosion of the probe and internal components.
It’s recommended to store the thermometer in its original packaging or a protective case to prevent physical damage. Do not store the thermometer with sharp objects that could scratch or damage the display or probe. Remove the batteries if the thermometer will not be used for an extended period, preventing potential leakage and corrosion.
Refer to your ThermoPro manual for specific storage recommendations related to your model, ensuring optimal preservation and readiness for your next culinary adventure.
Troubleshooting Common Issues
If your ThermoPro thermometer displays inaccurate readings, first ensure the probe is correctly inserted and clean. Low batteries can also cause erratic behavior; replace them with fresh ones. For unresponsive units, verify the power button is functioning and the thermometer is switched on.
Should the display freeze, try resetting the thermometer by removing and reinserting the batteries. If alarms fail to sound, check the alarm settings and ensure they are properly configured. Consult the manual for specific error codes and their meanings.
For persistent issues, download the detailed instruction manual from thermopro.com.sg or thermoproshop.co.za for comprehensive troubleshooting steps tailored to your specific model.

Safety Precautions
Always avoid probe damage during use and storage. Handle the thermometer with care, following manual guidelines for safe operation and preventing potential hazards.
Prioritize safe handling to ensure accurate readings and prolong the life of your ThermoPro device.
Avoiding Damage to the Probe
Protecting the probe is crucial for maintaining the accuracy and longevity of your ThermoPro meat thermometer. Never insert the probe into extremely hard surfaces, such as bones, as this can bend or break the sensitive sensor.
Avoid forceful insertion; gently guide the probe to the desired depth. Do not leave the probe inserted in high-heat environments for extended periods without monitoring, as excessive temperatures can damage the probe’s components.
When cleaning, avoid abrasive cleaners or scouring pads, which can scratch or corrode the probe. Always rinse with warm, soapy water and dry thoroughly. Proper storage is also vital; avoid bending the probe when storing and keep it away from sharp objects.
Regularly inspect the probe for any signs of damage, and if found, discontinue use.
Safe Handling of the Thermometer
ThermoPro thermometers are designed for safe and reliable use, but proper handling is essential. Always wash your hands thoroughly before and after handling the thermometer, especially after contact with raw meat or poultry.
Be cautious when using the thermometer with hot surfaces or liquids. Use oven mitts or heat-resistant gloves to protect your hands. Never touch the metal probe directly when it’s hot, as it can cause burns.
Avoid dropping the thermometer, as this can damage the internal components. Do not disassemble the thermometer, as this will void the warranty and may create a safety hazard. Keep the thermometer out of reach of children.
Ensure the thermometer is dry before storing to prevent corrosion and maintain functionality.
Warranty Information
ThermoPro stands behind the quality of its products, offering a warranty against manufacturing defects. The standard warranty period is typically one year from the date of original purchase, though this can vary by model.
To claim warranty service, retain your proof of purchase and contact ThermoPro customer support. The warranty covers defects in materials and workmanship under normal use. It does not cover damage caused by misuse, accidents, or unauthorized modifications.
Disassembly of the thermometer voids the warranty. ThermoPro will, at its discretion, repair or replace the defective product. Shipping costs for warranty claims may be the responsibility of the customer.
Visit the ThermoPro website for detailed warranty terms and conditions specific to your model.